
A
delicious cheesecake is not difficult to make as long as you go about it in the
right way. Simple steps such as waiting for the cream cheese to become room
temperature and using a water bath make quite a large difference in the final
product. You wouldn’t want to taste chunks of cream cheese in the cake or for
your cheesecake to crack.
I usually make Oreo cheesecakes, but I wanted to make a plain vanilla cheesecake for once. Instead, since James wanted to be more experimental, we ended up making an orange cheesecake using Moro blood oranges. We only used this type of orange because we bought them just before making our cheesecake, but you can use any type of orange.
We scaled down Alton Brown’s Sour Cream Cheesecake recipe and made it in an 8 in. springform pan. James and I have slightly edited the directions and added our own comments, but the most significant change that affects the recipe is the time in the oven. The time is increased to 1.5 hours which is done because the original recipe's baking time creates a cheesecake that's too soft and custard-like.
Ingredients
Crust:
18 graham cracker squares, crumbled
4 tablespoons (1/2 stick) unsalted butter, melted
1 tablespoon sugar
Filling:
16 ounces cream cheese (room temperature)
1 cup sour cream
3/4 cup sugar
2 teaspoons vanilla extract
1 tablespoon of grated orange zest
2 large eggs
2 yolks
1/4 cup heavy cream
A pinch of salt
Directions
· Preheat oven to 300 degrees F.
· In a small bowl, combine crumbled graham crackers, the melted butter, and 1 tablespoon of sugar. Press 2/3 of the mixture into the bottom of the pan. Place remaining crumbs on a sheet pan and bake both the crust and the remaining mixture for 7-8 minutes. Cool. Reserve additional crumb mixture for sides.
· In a large bowl, cream the cream cheese and sugar until mixture is smooth and lightened. Make sure there are no lumps as they don't disappear after baking. Add the sour cream and mix until smooth.
· In a separate bowl, combine vanilla, orange zest, eggs, yolks, and heavy cream. Pour the liquids into the cream cheese mixture and whisk to incorporate. Once completely combined, pour into the cooled crust.
· In a separate bowl, combine vanilla, orange zest, eggs, yolks, and heavy cream. Pour the liquids into the cream cheese mixture and whisk to incorporate. Once completely combined, pour into the cooled crust.
· Lower oven temperature to 250 degrees F. Place cheesecake into a preheated water bath, in the oven for 1.5 hours. After 1.5 hours, check the cheesecake to see if it is done. When jiggled, the cheesecake should only slightly wobble in the center. Once done, turn the oven off and open the door for one minute. Close the door for one more hour. Remove the cheesecake from the water bath and let it come to room temperature on a cooling rack before storing it in the refrigerator. Allow the cheesecake to set in the refrigerator for at least 3 hours, but preferably 6 hours to ensure that it will fully set.
· When ready to serve, run a plastic knife along the sides of the pan and carefully unmold the cake onto a serving dish or plate. Take the remaining graham cracker mixture and press into the sides of the cake by rotating the unmolded cake over the sink and gently pressing the crumbs into the cake.
· To slice, place your knife into some hot/warm water and wipe clean each time you make a pass through the cake.
Our finished cheesecake was light and creamy and had a subtle orange taste which was more noticeable towards the end of each bite. It tasted remarkably like an orange creamsicle. It's not as dense as a typical New York style cheesecake, but it is still rich, tasty, and definitely a crowd pleaser.

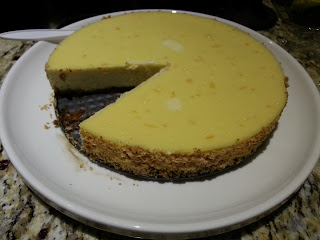
Our finished product!

We had extra graham cracker crumbs so we decided to sprinkle some on top of our first slice

Cheesecake with a slice cut out (Almost looks like Pacman!)
- Judith


